Before you start logging to your softhone to receive calls from Exotel , please visit https://my.exotel.com/voipinfo .
Here you will find the user credentials required to login . Set your VOIP password in this page first and you are all set to login in your softphone
The https://my.exotel.com/voipinfo page in your Exotel dashboard shall look like this screenshot shown below
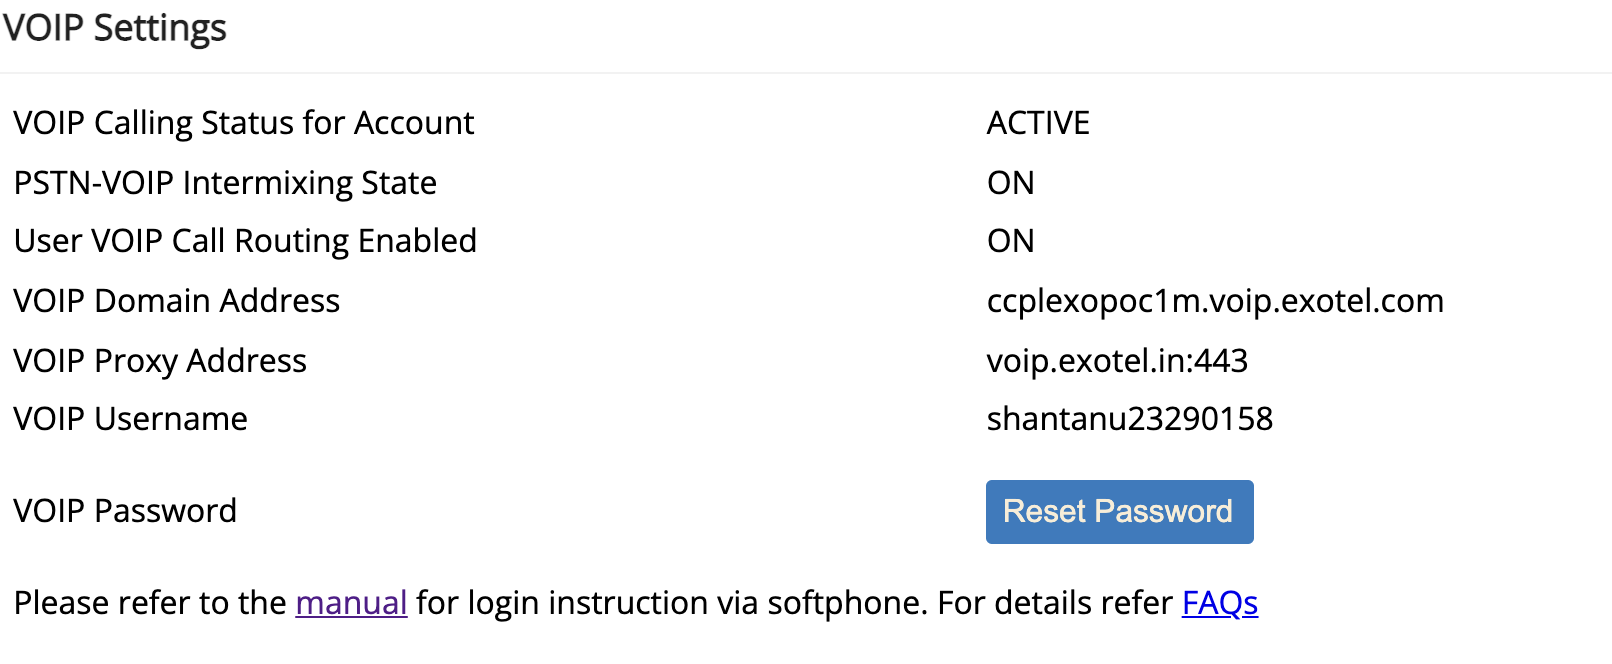
In the above page , you need to click on the "Set Password" link to set the password of your choice for the softphone . Once you set the password , login to your softphone like shown below
NOTE :- Please ensure you are using the Pro version of Zoiper , as the free version doesn't support TLS version
Step 1 :- Click on the settings button in the Zoiper home screen

Step 2 :- Select Account option in settings page , and fill the details as shown below

Here
Domain name :- <VOIP Domain Address>
Username :- <VOIP Username>
Password :- <What you set in the settings page>
Outbound Proxy :- <VOIP Proxy Address>
Step 3 :- Click on the Advanced settings in the Accounts page and configure the below options
A. In the Network related option Choose TLS
B. In Encryption section -> Change the SRTP key negotiations from None to SDES by default
Step 4 :- Exit the Accounts Wizard and save the configuration
Post this you should be able to login successfully using Zoiper